Understanding Embroidery Digitisation: A Guide to Branded Workwear Branding

What is Embroidery Digitisation and Why is it Essential?
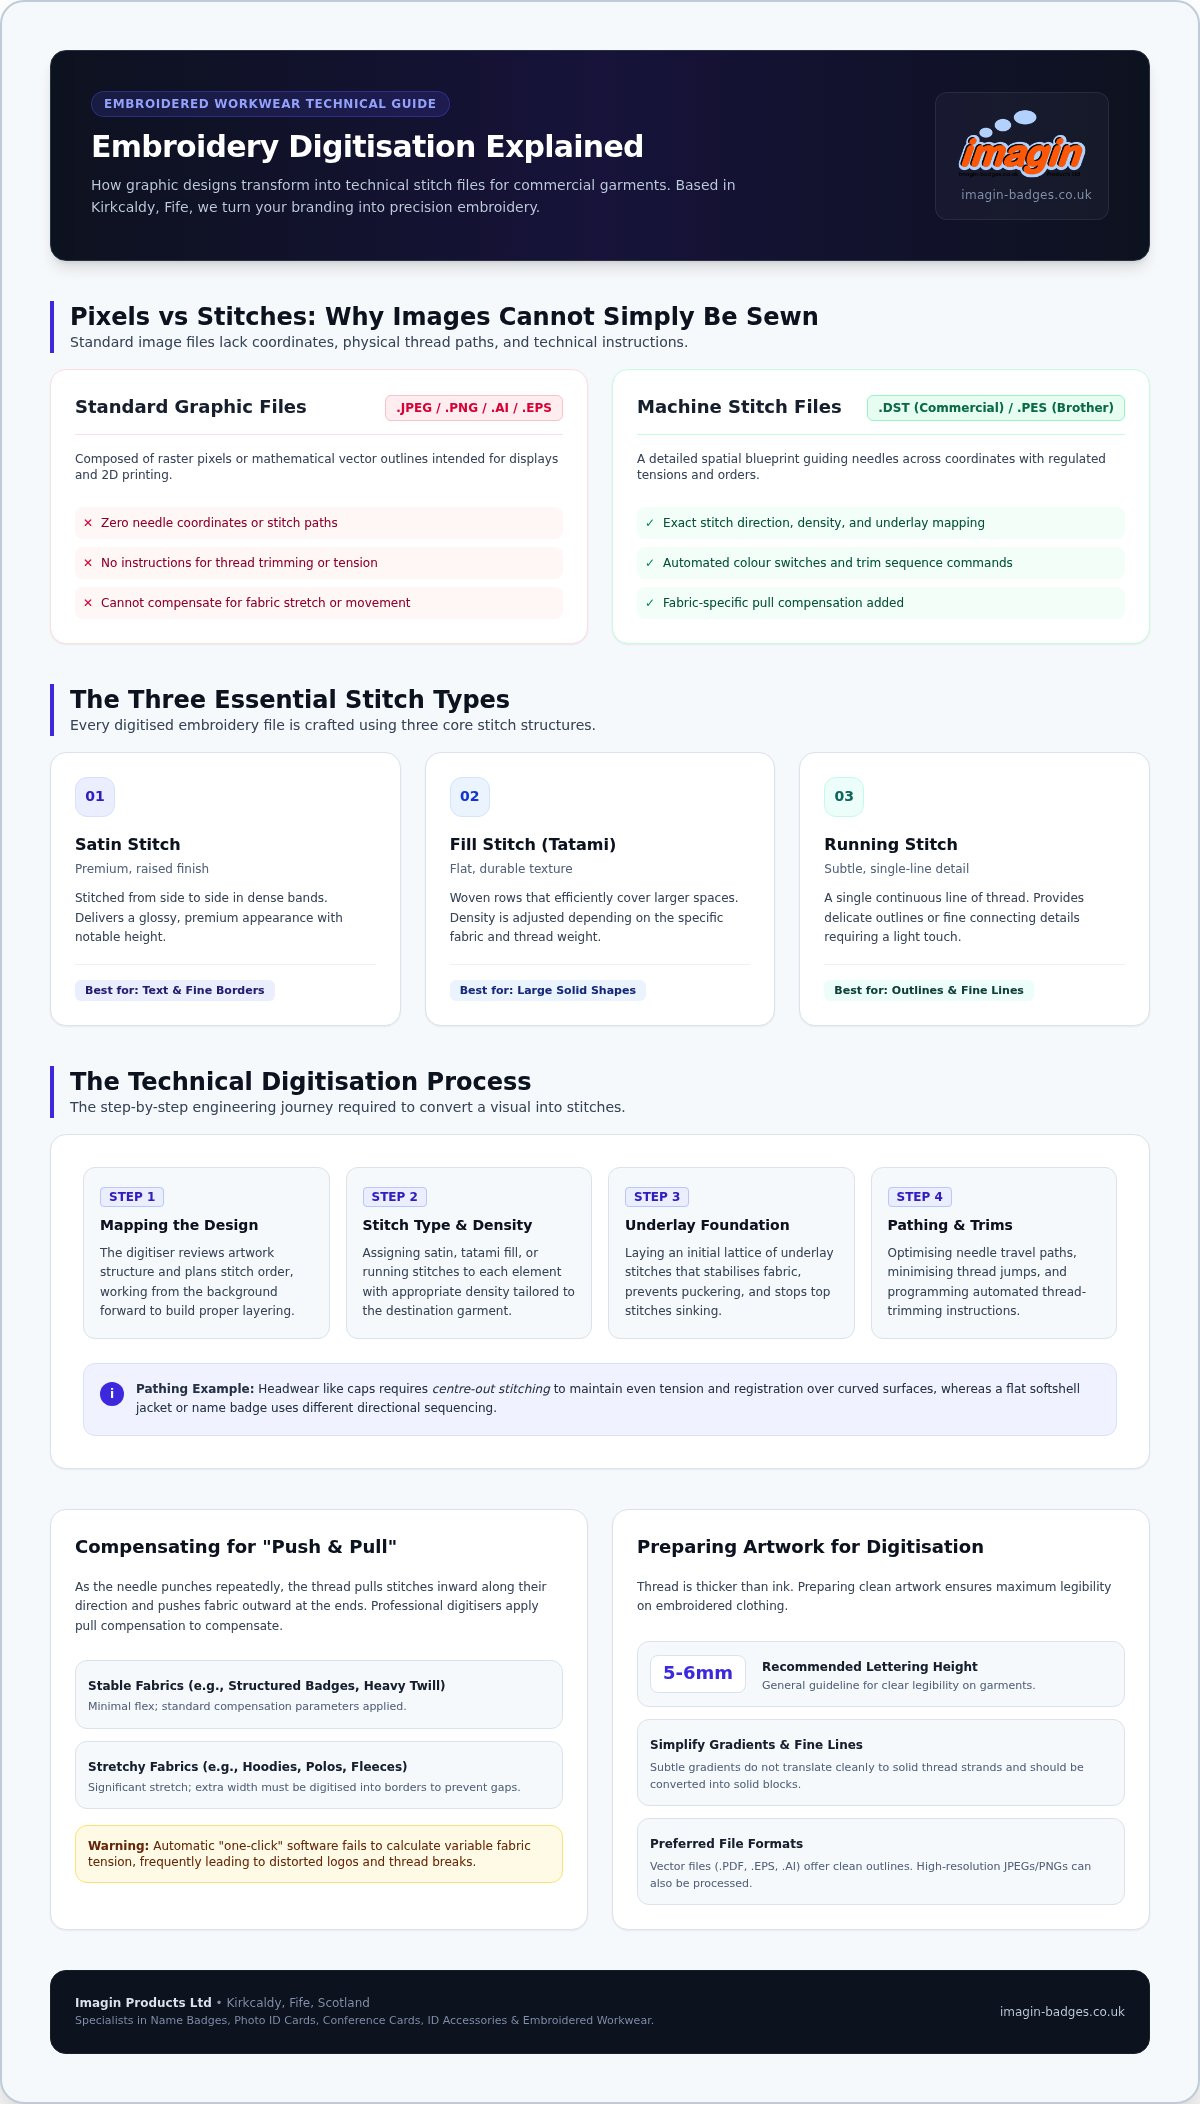
Embroidery digitisation is the process of converting your digital logo into a stitch file that an embroidery machine can understand. This file format (such as .DST or .PES) serves as a blueprint for the embroidery machine, guiding it on how to create your design with precision.
It’s important to understand that embroidery machines operate differently than printers. While printers interpret pixels and colours, embroidery machines follow a predetermined set of coordinates and paths. Think of it as creating a detailed map for construction—without this map, the machine would not know where to stitch.
Many clients mistakenly believe that a high-resolution JPEG or PNG file will suffice for embroidery. However, these formats do not contain the necessary instructions for the embroidery process, which is why professional digitisation is crucial.
- Embroidery digitisation is not just a file conversion; it’s a comprehensive process that requires expertise and an understanding of textiles.
- Machine-readable formats, like .DST, are tailored for commercial embroidery machines, while formats like .PES cater to Brother machines.
The Difference Between Pixels and Stitches
Raster images, such as JPEGs and PNGs, are composed of dots, while embroidery is made up of physical thread. This distinction is vital because the scaling of digital images is straightforward, but enlarging an embroidery design can lead to poor coverage and excessive stitch lengths unless the design is recalibrated or redigitised.
Moreover, the path the needle takes is crucial. A well-planned path prevents thread breaks and ensures that the final product looks professional.
Why Professionally Digitised Logos Look Better
A professional digitiser not only maps each element of the design but also controls the stitch type, direction, density, underlay, sequencing, and pull compensation. This attention to detail ensures that the final embroidery enhances the fabric rather than detracts from it.
- Underlay stitches support the top stitches, improving coverage and helping to reduce distortion, sinking, and puckering.
- Inadequate digitisation can result in unsightly puckering or gaps, diminishing the overall quality of the logo.
The Technical Process: How Your Logo Becomes a Stitch File
Understanding the journey from your uploaded logo to the embroidered garment can demystify the digitisation process.
- The first step is mapping the design, where the digitiser decides which parts of the logo to stitch first.
- Following this, the digitiser selects appropriate stitch types—satin stitches for borders and fill stitches for larger areas—based on the fabric and design requirements.
- The digitiser will also provide trimming instructions that indicate when to cut the thread and shift to a new section of the design.
Choosing the Right Stitch Types
Different stitch types serve distinct purposes:
- Satin stitches: Ideal for text or fine borders, offering a premium, raised appearance.
- Fill stitches (Tatami): Efficiently cover larger areas, with the density dependent on the fabric and thread used.
- Running stitches: Best for delicate details or outlines, requiring a lighter touch.
Pathing and Sequence Optimisation
The sequence in which stitches are applied significantly impacts the final product. Elements are ordered to control fabric movement, maintain registration, and minimise unnecessary jumps. For instance, centre-out stitching is often employed for caps to ensure even tension throughout the design.
Why You Cannot Simply Use a Standard Image File
Even if you have a vector file (like .AI or .EPS), it doesn’t mean the file is ready for embroidery. Vector files provide a mathematical representation of shapes but lack the stitch instructions required for embroidery.
Standard image files do not include critical information such as stitch types, density, direction, sequencing, trims, colour changes, and needle paths. These elements are essential for a successful embroidery process.
- Different fabrics, such as embroidered polo shirts versus fleeces, necessitate varying digitisation settings to achieve the best results.
- It's also worth noting that a logo digitised for a cap may not perform well on a softshell jacket due to the differing tension requirements.
Compensating for Fabric "Push and Pull"
As the needle penetrates the fabric, slight movement occurs. This is where "pull compensation" comes into play—adding extra width to a design to ensure it maintains its intended appearance once stitched.
For instance, digitising a stable name badge compared to a stretchy hoodie requires different approaches to fabric handling.
The Problem with Automatic Digitisation
Relying solely on "auto-digitising" software can lead to inefficient paths and poor quality. Human oversight is essential to ensure that text is legible and colours appear crisp. Our dedicated team in Kirkcaldy reviews each design to uphold our high standards.
How to Prepare Your Artwork for Professional Digitisation
When preparing your logo for digitisation, consider the following tips:
- Simple designs typically yield the best results, especially for smaller branding areas like the left chest.
- Avoid very thin lines or tiny gradients, as these may need to be simplified for better execution.
- Providing high-resolution files allows the digitiser to create the best possible outcome.
Simplifying Your Logo for Stitching
Complex designs with gradients may not translate well to thread, so it's essential to consider simplifying these elements. A guideline for lettering is to aim for sizes around 5–6mm high for clear legibility, although the practical minimum may vary based on factors such as font, fabric, thread, and machine setup.
Selecting the Best File Formats
While vector formats like .PDF, .EPS, and .AI are preferred because they can be enlarged without pixelation, they still require professional digitisation to be suitable for embroidery. If your only option is a high-quality JPEG, we can still work with it to create the best result.
Expert Embroidery Services: Why Quality Digitisation Matters
At Imagin Products, we pride ourselves on being a partner that values the aesthetic of your branded workwear. Our digitisation process is designed to alleviate the stress of the ordering process while ensuring that your embroidery remains secure and professional through appropriate washing and wear.
A well-executed digitisation process is an essential part of achieving a professional, durable finish, but it’s essential to remember that factors such as garment quality, thread types, backing, needle, and operator skill also influence the result.
Our Approach as a Knowledgeable Scottish Business
With our roots in Kirkcaldy, we take pride in our craftsmanship and see every project as a unique creative endeavour. Our rapid turnaround times and national UK delivery ensure that we meet the needs of our customers efficiently.
Ready to Brand Your Team?
Choosing a professional manufacturer for your embroidery needs ensures quality and durability. Explore our range of professional embroidered workwear to see examples of our craftsmanship, and contact us today to discuss your embroidery requirements.
FAQs
- What is the difference between a logo file and a digitised file? A logo file (like a JPEG) is a digital image made of pixels, whereas a digitised file is a set of specific instructions that tells an embroidery machine where to place each stitch, which colours to use, and when to cut the thread.
- Do I have to pay for digitisation every time I order? No, once we have digitised your logo, we retain the file on record. You only pay the setup fee for your first order; subsequent orders using the same logo at the same size will not require a new digitisation fee.
- Can any logo be embroidered? Most logos can be embroidered, but some very complex designs with fine gradients or tiny text may need to be simplified to ensure a professional and legible finish on the fabric.
- How long does the digitisation process take? At Imagin Products, we aim for a rapid turnaround. Usually, the digitisation and sample approval process takes just a few working days as part of your overall order timeline.
- Why does the price change for larger embroidered logos? The price is often determined by the stitch count. A large logo on the back of a jacket typically requires significantly more stitches and machine time than a small logo on a polo shirt chest.
- Can I use a logo digitised for a shirt on a cap? Not always. Different items require different digitisation settings to account for the shape and "push and pull" of the material. We ensure your logo is optimised for the specific garment you choose.