
Multi-card badge holders for events and conferences

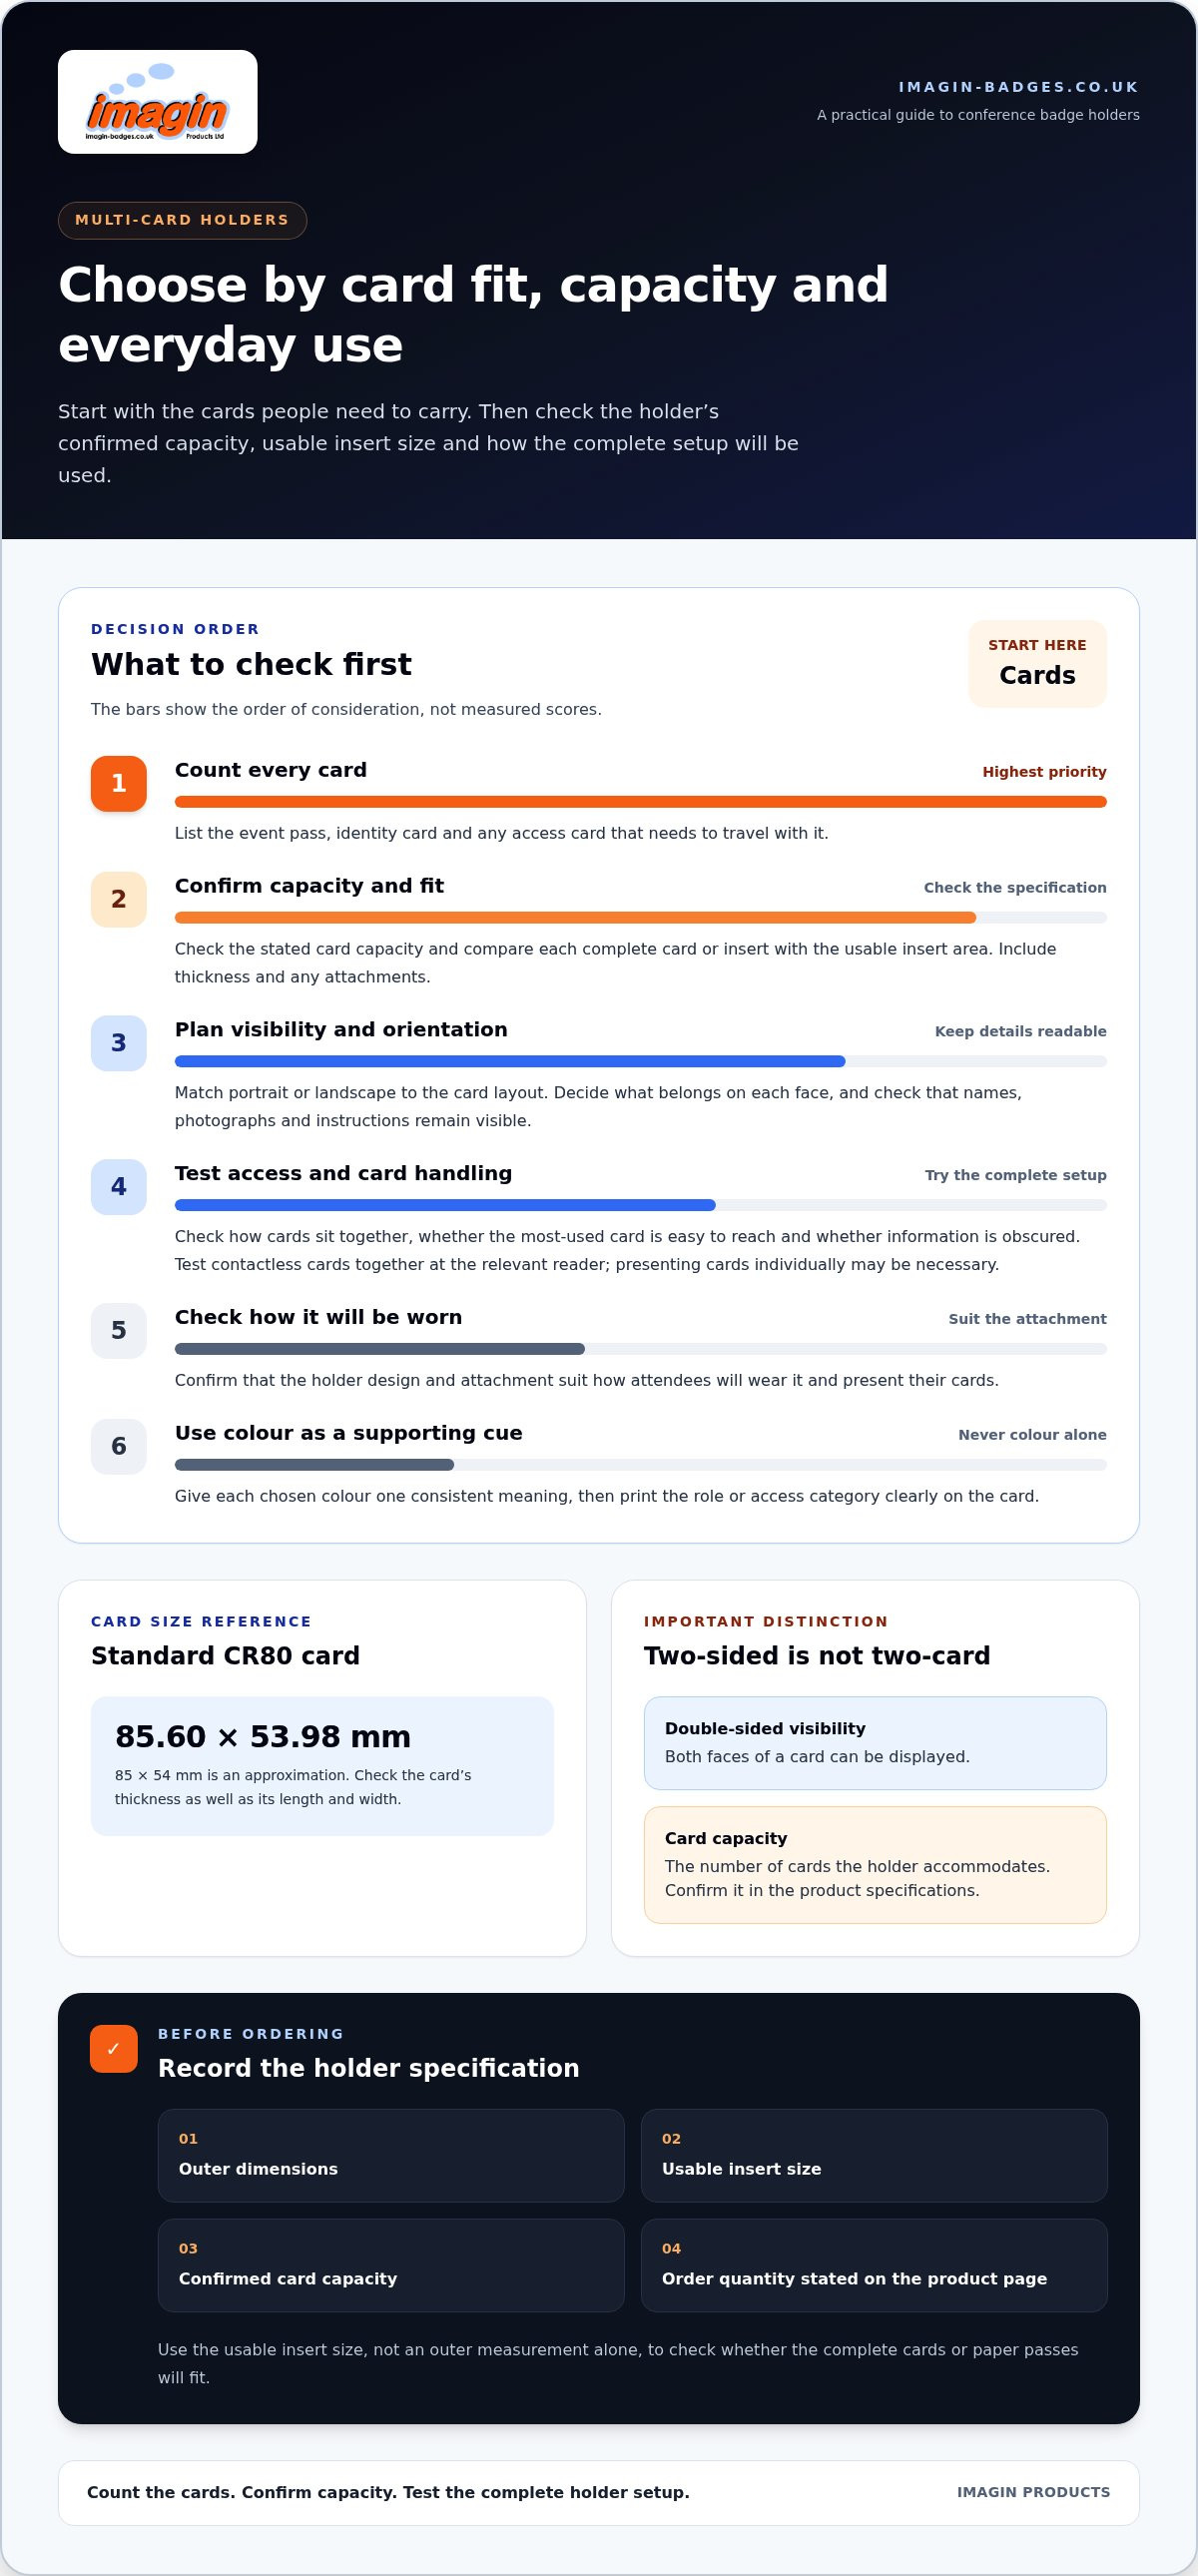
Choose a multi-card badge holder by the cards you need to carry and the capacity confirmed in its product specifications. Double-sided visibility means that both faces of a card can be displayed; it does not necessarily mean that the holder accommodates two cards. Check the stated capacity, card format and how the holder will be worn before ordering.
Once you know what needs to fit, decide whether cards should be visible on one or both sides, whether portrait or landscape orientation suits your artwork, and whether colour can help distinguish delegates, staff or access levels. This guide explains how to weigh up those choices and what to consider when ordering holders and conference badges together. A clear specification makes it easier to plan registration, identification and day-to-day access.
Key Takeaways
- Count every card you need to carry, then check the holder’s confirmed capacity and intended card format.
- Distinguish double-sided visibility from two-card capacity; displaying both sides of one card does not necessarily accommodate two cards.
- Match portrait or landscape orientation to your card layout so names and event details remain easy to read.
- Treat colour as a secondary indicator and print the role or access category clearly on the card.
- Test the completed holder setup, including card visibility, fit and contactless use.
Holder sizes for events and conferences
Start with the cards delegates must carry, rather than choosing a holder by appearance. Standard CR80 cards measure 85.60 × 53.98 mm; 85 × 54 mm is an approximation. Check the thickness as well as the length and width, particularly where cards have attachments or are carried together. A holder showing both sides of one card is not automatically a two-card holder, so confirm capacity in the product specifications.
- Count the cards: include the delegate pass and any additional card that must travel with it.
- Measure the complete items: compare each card or insert, including its thickness, with the holder’s usable insert area.
- Check confirmed capacity: do not infer the number of cards from double-sided visibility or from the number of holders in an order.
- Confirm the order quantity: use the quantity stated on the relevant product page.
For example, an organiser issuing an event pass and an access card should confirm that the selected holder is specified for two cards of the right format. An event using a larger paper pass should compare the complete insert with the holder’s usable insert size rather than relying on an outer measurement alone.
Record the holder’s outer dimensions, usable insert size, confirmed card capacity and the order quantity stated on its product page. This gives the registration team a clear specification without treating one holder’s measurements or quantity as a general standard.
Landscape and portrait orientations
Match the card artwork to its orientation before preparing the final event file. Landscape gives you a wider canvas for a delegate’s name and organisation. Portrait arranges details vertically, which can suit a stacked name, photograph and event title. Choose based on the information hierarchy, not simply the holder’s appearance.
If cards display information on both sides, decide what belongs on each face before laying out the artwork. Put the most frequently needed information on the side presented first. Secondary details can go on the reverse, provided the event team knows where to find them. This keeps the front from becoming crowded and difficult to scan.
Before approving the artwork, review a proof in its intended orientation. Check names, logos, spacing and instructions from the top and sides, not just on screen. Ask someone unfamiliar with the design to find the key detail. A quick review can reveal a layout that seems obvious to its creator but is unclear to a delegate.
Holder colours
Choose a holder colour for a clear purpose, such as grouping event roles or matching a visual identity, but treat colour as a secondary indicator. Print the role or access category clearly on the card so identification does not rely on colour alone. Check that the holder leaves names, photographs and instructions visible.
Use a simple selection process before ordering:
- Set the purpose: decide whether colour supports a role or access category.
- Use one consistent key: give each chosen colour one meaning throughout the event.
- Print the category clearly: ensure the card remains identifiable without relying on colour.
- Check visibility: make sure the holder does not obscure names, photographs or instructions.
Holders for multiple access cards
Choose capacity based on the cards people need to carry and use, checking the confirmed product specification. Common drawbacks of carrying several cards together include extra bulk, harder-to-reach cards and information obscured by overlapping cards. Test contactless cards together to identify possible card clash at readers: carrying multiple cards together does not ensure that they will scan properly, and presenting cards individually may be necessary.
Multiple access card capacity
Before choosing, list each card and its purpose. Confirm that the holder’s stated capacity covers the cards and that their dimensions and thickness match the usable insert area. If people need to carry several cards, check how they sit and whether the most-used card is easy to reach. The number of visible sides does not confirm the number of cards accommodated.
Holder materials and designs
Consider the practical effect of carrying several cards together. A full holder may sit differently from one carrying a single card, and overlapping cards can make details harder to see. If staff need to present a particular access card, decide how they will identify and reach it, then test the complete arrangement at the relevant reader.
Use these checks before choosing a design:
- Count the cards: include event, identity and access cards used together.
- Match dimensions: compare each card with the holder’s intended format.
- Plan card order: place the most frequently used card for straightforward access.
- Review attachment: confirm the holder design suits how it will be worn.
What materials and designs are used for multi-card holders?
Assess how the holder handles cards during the working day, not just how it looks. Material, seams, openings and attachment points affect how cards sit together. A holder used at a registration desk faces different demands from one worn throughout a conference. Match its construction to how attendees will present, remove and return their cards.
Distinguish the holder’s outer dimensions from its usable insert size. Compare the complete card or paper insert, including thickness and any attachment, with the area that actually accepts it; do not assess fit solely from an outer measurement such as 145 × 105 mm. Test the actual cards or inserts to confirm that they sit securely and can be removed without disturbing others.
Surface clarity matters when staff need to read printed information without removing a card. Check the name, photograph and instructions through the holder, and make sure the card stays correctly positioned. Keep critical information clear of seams, openings and attachment points. A proof using the actual card artwork can reveal these layout issues before event day.
- Inspect card access: practise removing and returning each card in its intended order.
- Check visibility: make sure names and essential details remain readable in the assembled holder.
- Review attachment placement: confirm that clips or lanyard connections don’t cover printed information.
- Try the finished arrangement: test the holder with every card it will carry.
If a badge setup includes a printed pass and a separate access card, decide which should face forwards. Keep the card used at check-in easiest to present, and position secondary information where it remains identifiable. If staff need to distinguish cards quickly, agree on a consistent arrangement before distributing holders. This helps prevent attendees from repeatedly turning the holder around.
Consider the attachment in relation to clothing and event activity. A clip needs a suitable place to fasten, while a lanyard keeps the badge available at chest level. Choose an arrangement that stays readable when the wearer is standing, seated or presenting a card. The right setup depends on how the badge will be used, not just its appearance.
Before finalising an order, assemble one complete example with the chosen cards, printed artwork and attachment. Check whether the cards overlap, whether the holder hangs as intended, and whether the key information remains visible. This practical review is more useful than judging an empty holder. You can compare relevant ID card holders and accessories as part of planning a coordinated event identification setup.
Imagin Products: Standard Name Badges
Imagin’s name badges and conference cards are related products for event identification. Use them alongside a suitable holder when names or event details need to be displayed clearly; choose the holder according to the cards it must carry.
Plan your event identification with confidence
Turn your holder choices into a clear event specification before placing an order. Note what each attendee needs to display, how many cards they will carry and how the badge should work alongside them. This gives your registration team a shared reference for preparing and distributing identification.
Choose a holder based on the cards people actually use, then record the confirmed capacity, usable insert size, orientation and attachment in the event specification. Test the completed setup before ordering.
When you’re ready, explore the options and plan an event setup that works for your attendees.
Frequently Asked Questions
What details belong on an event badge?
Include the details attendees and event staff need to identify the wearer. A delegate’s name, organisation and event title are useful examples. Keep the layout uncluttered so the most important information stands out. If the badge includes a photograph or access instruction, position it where it is easy to see. Leave out details that do not help identify or direct the attendee.
How can I make card collection smoother at registration?
Prepare badges in the same order as your attendee list, then keep uncollected cards separate from completed pickups. A clear collection process helps registration staff find a named delegate’s badge without searching through unrelated cards. Use a consistent way to record each collection, such as updating the attendee list immediately. This is especially useful when several registration desks share records.
How should I test an event badge layout before ordering?
Print a draft card at its intended size and place it inside the chosen holder. Check that names and other key details remain visible, then review it as an attendee or registration colleague would. This practical test can reveal crowded text or information hidden by the holder’s edges. Adjust the layout before preparing the final batch of event cards.
How should I confirm a multi-card holder’s capacity?
Check the specific product specifications for confirmed capacity, usable insert size and card format. Do not assume that a double-sided holder accommodates two cards, or that a similar-looking design has the same capacity. Test the actual cards together, including contactless use, before placing the order.

Article by
Team Imagin :)
Team Imagin helps businesses look their best with quality name badges, photo ID cards, lanyards and branded workwear. Based in Kirkcaldy, Scotland, we combine friendly, personal service with professional printing and embroidery to bring your branding to life. From small teams to large organisations across Scotland, the UK, Europe and America, we help you boost your brand and build connections.
Disclaimer
This article provides general guidance only. Information was correct to the best of our knowledge when published, but product details, prices and regulations may change. Check current specifications and official guidance before making decisions.